


This article will show how to update Synology DSM on a Proxmox (KVM) Virtual Machine using a Xpenology bootloader.
At the time of writing, it seems there is no issue so far to update up to dsm "6.2.3-25426".
Requirements (at the time of the writing):
- Proxmox VE 6.2-12 (or later) installed
- Xpenology dsm 6.1 already installed and running (see how to install)
- Xpenology Jun's Loader 1.03b for ds3615xs ( which can be found in this forum)
- DSM 6.2.3 (25426) file named "DSM_DS3615xs_25426.pat" (here)
(warning: images-intensive article)
(note0: Update seems to be working up to DSM 6.2.3-25426 for ds3615xs)
(note1: Do not update to DSM 6.2.4 which seems not working with Jun's loader 1.03b)
Warning
This system is for testing or educational purpose ONLY, and It is NOT recommended for use in production environment because it has no support and it has not been proven stable/reliable.
So if DATA LOSS happens by using this system, this is ONLY on your own responsibility.
If you are happy with the testing of this product, I would highly recommend you to go for an original Synology hardware especially for PRODUCTION environment where data is critical.
We recommend ...
... at least 512MB RAM
... at least 16GB of free disk space
Please, click on pictures to zoom.
Minor Update
If you have isolated your dsm OS by installing it in a specific vm disk, then proceed to a proxmox backup first.
Disable automatic update
It's highly recommended to disable automatic update as follow:
- Go to Control Panel > Update and Restore
- On the "DSM Update" tab,
- click "Update Settings" then check "Important updates only" (if available)
- and select "Download DSM updates but let me choose whether to install them" (or equivalent)
Check feedback
Check if there is no issue with the update on xpenology.com/forum/forum/78-critical-updates/ with an similar configuration.
Updating
Then if ok, just do a normal synology update as usual through "Control Panel > Update and Restore"
- Click
Download(if available) - Then click
Update Now, and clickYesat the confirmation prompt
Major Update
Check compatibility
First, you need to check, in xpenology.com/forum/ , if the bootloader is confirmed to be working with the next major update:
If there is no bootloader working with the next major update, then DON'T PROCEED. You will have to wait for a new compatible bootloader.
If the bootloader is confirmed to be working with this major update, then look in forum for positive feedback with an equivalent configuration.
Backup
Backup your configuration:
- Go to "Control Panel > Update and Restore"
- On "Configuration Backup" tab, click
Backup configurationbutton - Click
YESin confirmation prompt
Poweroff your xpenology vm.
Then detach (or comment in vm conf file) all disks, except bootloader and disk containing DSM OS.
If you have isolated your dsm OS by installing it in a specific vm disk, then proceed to a proxmox backup first.
Change bootloader
If usb disk, change vm conf file to set the path of the new bootloader.
If sata disk (raw file), backup by copying the file then replace this file by coying the new bootloader overiding the file.
Update/Migrate
Then restart xpenology vm.
Welcome back
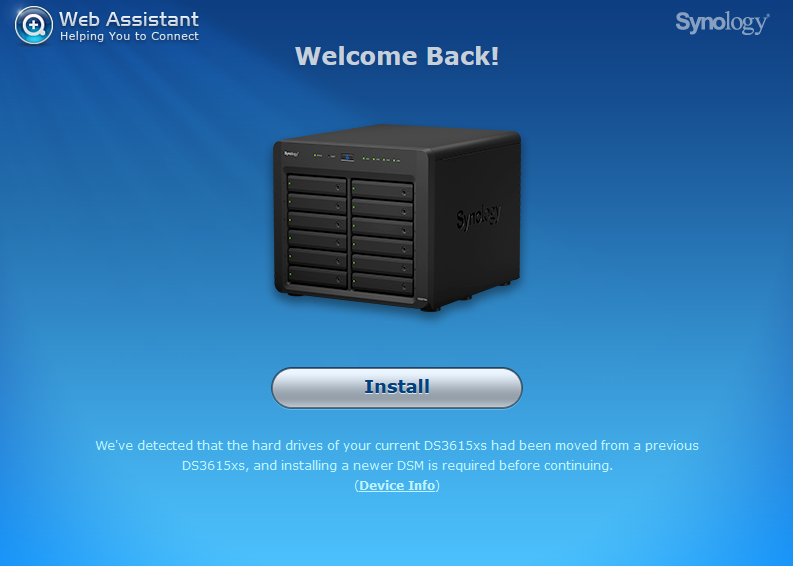
Click INSTALL
Select installation type

Select : "Migration: Keep my data and most of the settings"
Click > button
Install DSM
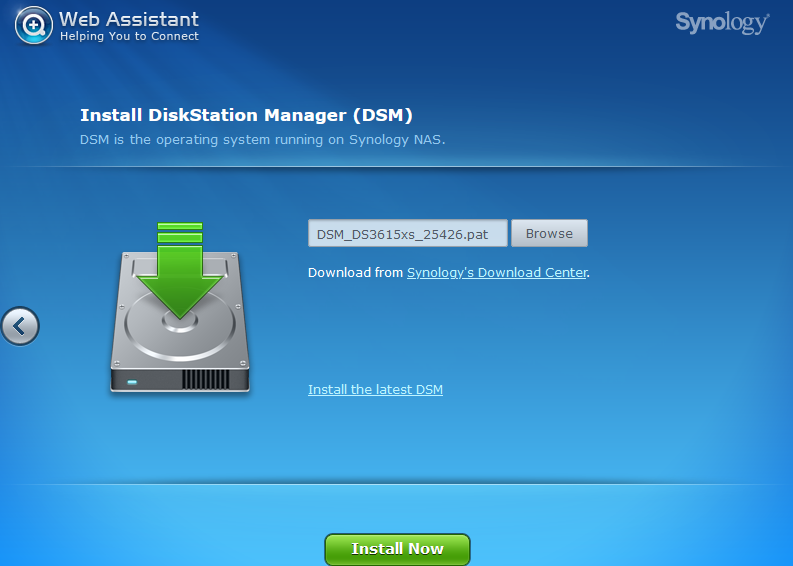
Click "Manual Install"
Click "Browse", then select "DSM_DS3615xs_25426.pat" file
Click "Install Now"
Installing DSM

Wait that install and reboot finished
Login
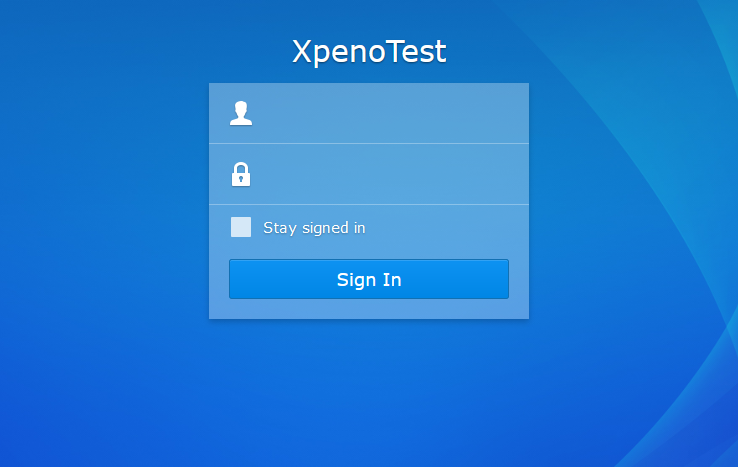
Login with your user / password
Troubleshooting
Slow then freezing
Note: Consider to (re)install your dsm os on a dedicated vm disk in order to isolate it and get easier maintenance.
If your dsm operating system is slow and then freeze later on
- Then you may need to proceed to a clean (re)install of the dsm (check here).
- Then, reload your dss configuration previously saved.
- Then, re-attach your data disks to the vm.
Unfortunately, you will have to reinstall and reconfigure all your apps.
Corrupted file on minor update
It seems that minor update does not work with the bootloader as SATA disk.
But it seems to be working good with the bootloader as USB disk and its vid/pid modified to match usb disk. (see installation to change vid/pid and swith to usb bootloader)
HTH,
Michel.
Recommendation
- Keep a copy of the bootloader in case of active bootloader get corrupted
* in the same folder or somewhere safe and easy to access
* if active bootloader is corrupted, just copy (and replace) the backup bootloader to active bootloader
- Use bootloader as usb disk, if you can
- Install dsm OS in a dedicated virtual disk (8GB or 16GB should more than enough)
- do not use this disk as dsm storage disk (or storage pool)
- Install dsm without any additionnal disk (which can be add later)
- Backup your vm
- Then now you can add additionnal disks or passtrough a SATA controller
* configure it as dsm storage disks
* storage disks are separated from OS disk
* this way data are safer cause you can safely unplug data disks for update, manipulation (or OS corruption)
Reference
Forum Xpenology (xpenology.com)
Tutorial: DSM 6.x on Proxmox (Thread on xpenology.com)
Proxmox backup template (Thread on xpenology.com)
Xpenology running on docker (Thread on xpenology.com)
Tutorial to compile xpenology dsm driver (xpenology.club)
Install Xpenology DSM 6.1.x on Proxmox (uxora.com)
Install Xpenology DSM 6.2.x on Proxmox (uxora.com)
Enjoyed this article? Please like it or share it.

Please connect with one of social login below (or fill up name and email)